Second example
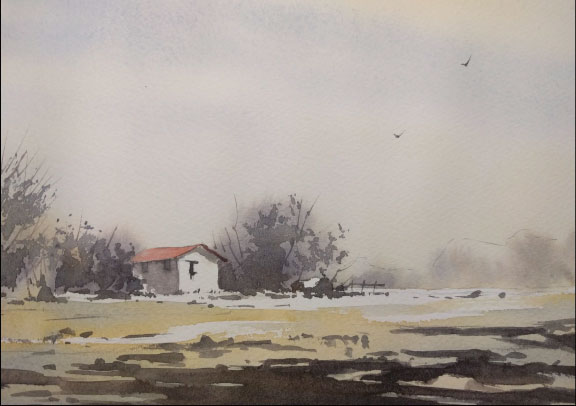
The main goal of our second example is learning how to deal with multiple colours at the same time. Students need to get familiar with colour mixing. Colours can be put together on a separate pallet or directly onto the paper. Letting colours to merge spontaneously on wet paper is one of the main features of watercolour painting. It can originate fresh and natural effects. Furthermore, this exercise will describe a few of the main composition aspects of landscape painting.
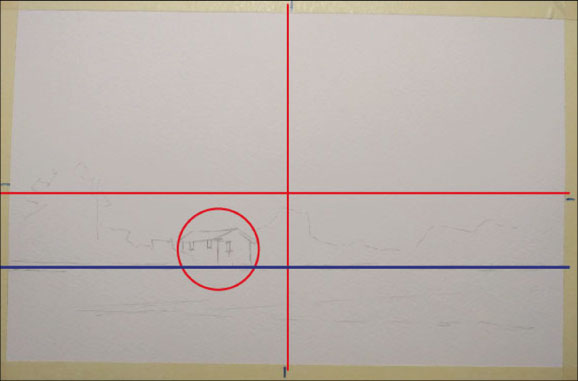
Begin a basic pencil drawing, taking good care of the following principles:
- Avoid putting the horizon line exactly half way trough the vertical middle of the paper.
- Avoid placing the main focal point (the house) exactly in the centre of the drawing.
Sky
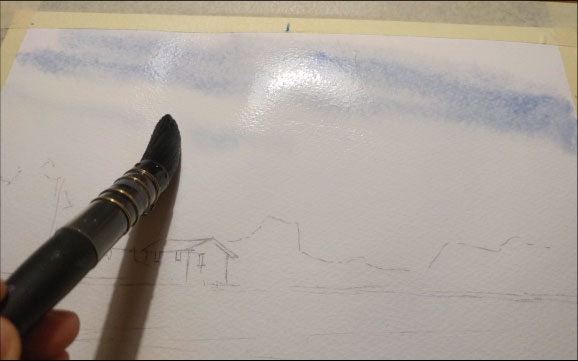
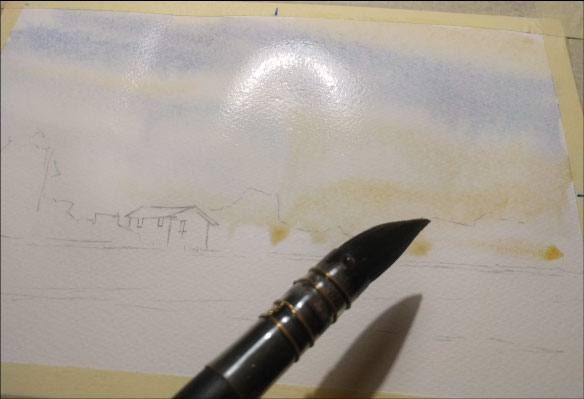
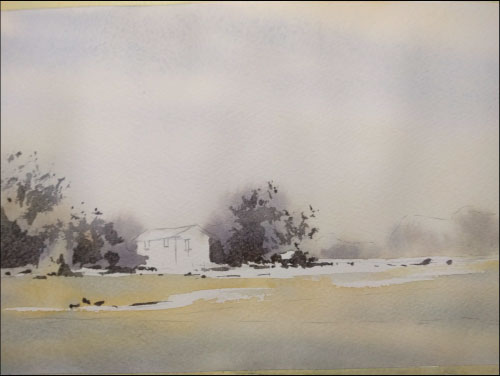
Wet the sky area using abundant clean water. Lay water on top of the trees, but leave the house dry painting around it. Working from top to bottom, use cobalt blue for the first layer of the sky. Use large wide strokes from outside of the paper towards the inside. Try to leave some white areas between blue strokes, especially closer to the horizon. Clean the brush and switch to yellow ochre. Repeat the same motions, but use yellow on the white spaces you’ve left behind. Be careful! You don’t need a lot of water on your brush during this stage: there’s should be enough already on the paper. If necessary, dry the brush a little on your paper towel.
Trees and ground
Prepare the colours before wetting the paper, so that you will not waste precious time mixing colours while the water is drying.
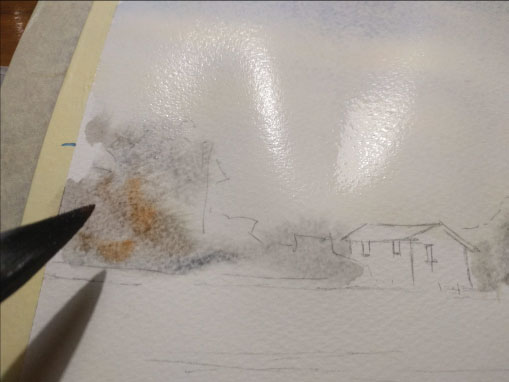
Now you are going to mix cobalt blue and raw sienna to obtain a versatile, yet simple, shade of grey. While still painting wet on wet, drop some grey on the trees. Clean the brush, then drop some mall amount of raw sienna on the trees again to add variety to the scene.
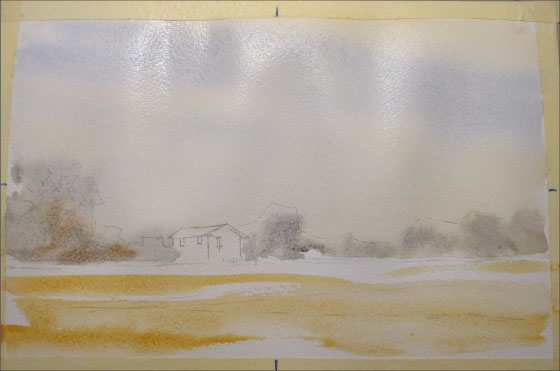
Without wetting the paper again, use yellow ochre on the lawn area just like you did for the sky. Leave some white areas here as well, they will give more light to the painting. While the yellow ochre is still wet, use the same method you’ve already practised on the sky and add cobalt blue on the ground. If you’re painting fast, the first layer of yellow will not have dried yet and these two colours will mix nicely on your paper.
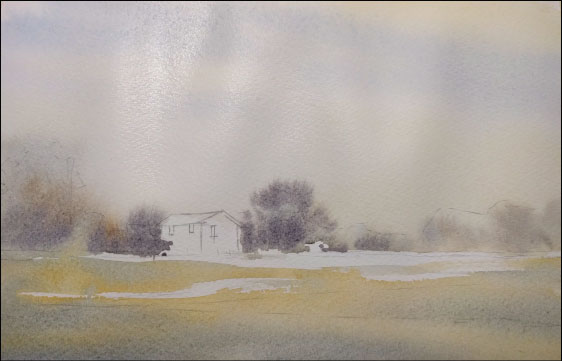
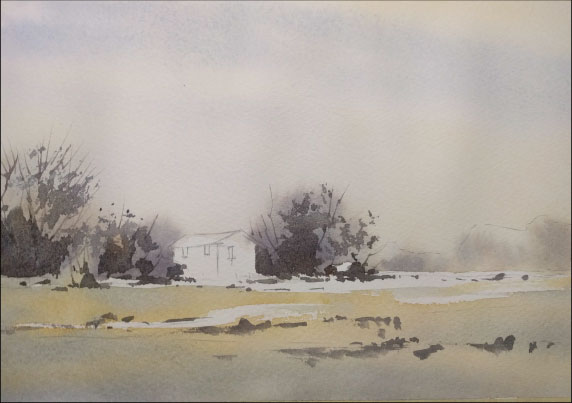
Add a touch of red to the grey colour you’ve prepared and strengthen the grey tone of the trees around the house. It’s important to make your focal point stand out creating a contrast of colours around it. Such contrast will appear between the white wall and the dark trees.
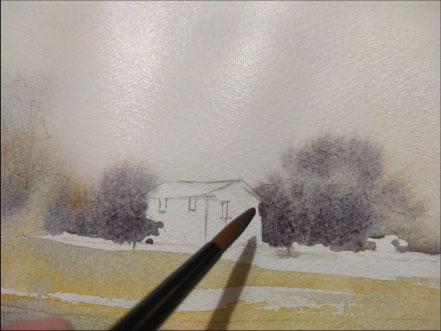
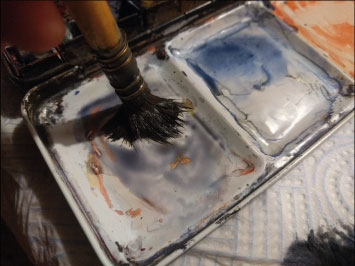
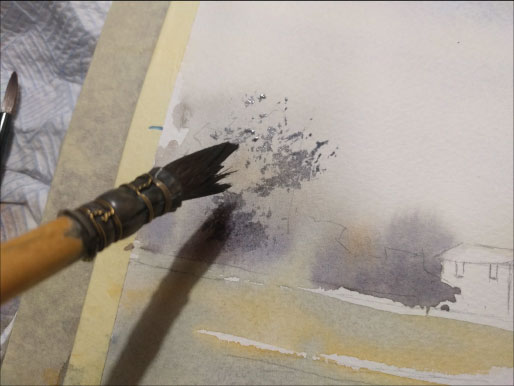
Let the painting dry completely. Make your grey stronger by adding some more blue, sienna and red without using a lot of water to mix these three colours. Dry your brush a little on your paper towel and spread the tip smashing it on the wooden board as it is shown in the picture. Then proceed to gently touch the paper with it to create a random pattern that will prove to be extremely effective suggesting tree’s foliage in the distance. Using always the same colour, paint a couple of lower bushes and some shadows around the bottom of the house. Don’t work on the right-end trees to add some depth to your scene.
Use the rigger brush to define details of the vegetations. Try painting as fast and freely as possible. You can still use the same grey mix of blue and raw sienna.
Building
Paint the house: start with the roof and the shadow on the wall. Let the house dry before painting the windows and the details around the roof.
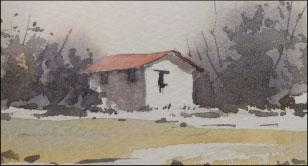
Make your painting even more interesting with some other details like an old broken fence to the side of the house.
The shadows on the foreground are painted using always our usual grey mix: these shadows are supposed to represent a tree out of view on the right. They are an essential element of the composition because they push our focal point backwards, adding depth to the painting. A you can see, the process we just used is fairly similar to the one of my first example. It is a solid ground on which you can build every landscape you will decide to paint. I really hope it will help you improve!